
Boron-capped prop outlines
Many of the top fliers in F1D are using carbon outline props. One of the drawbacks to using carbon is the sanding required to get down to weight. This is what drew me to towards boron-capped prop outlines.
For this example, I used standard 0.025″ 5# balsa cut into squares. I like using several reference marks to keep the grain straight and ensure that there is no twist introduced. Because many of the steps are the same as building a standard built-up prop, not every step is illustrated.
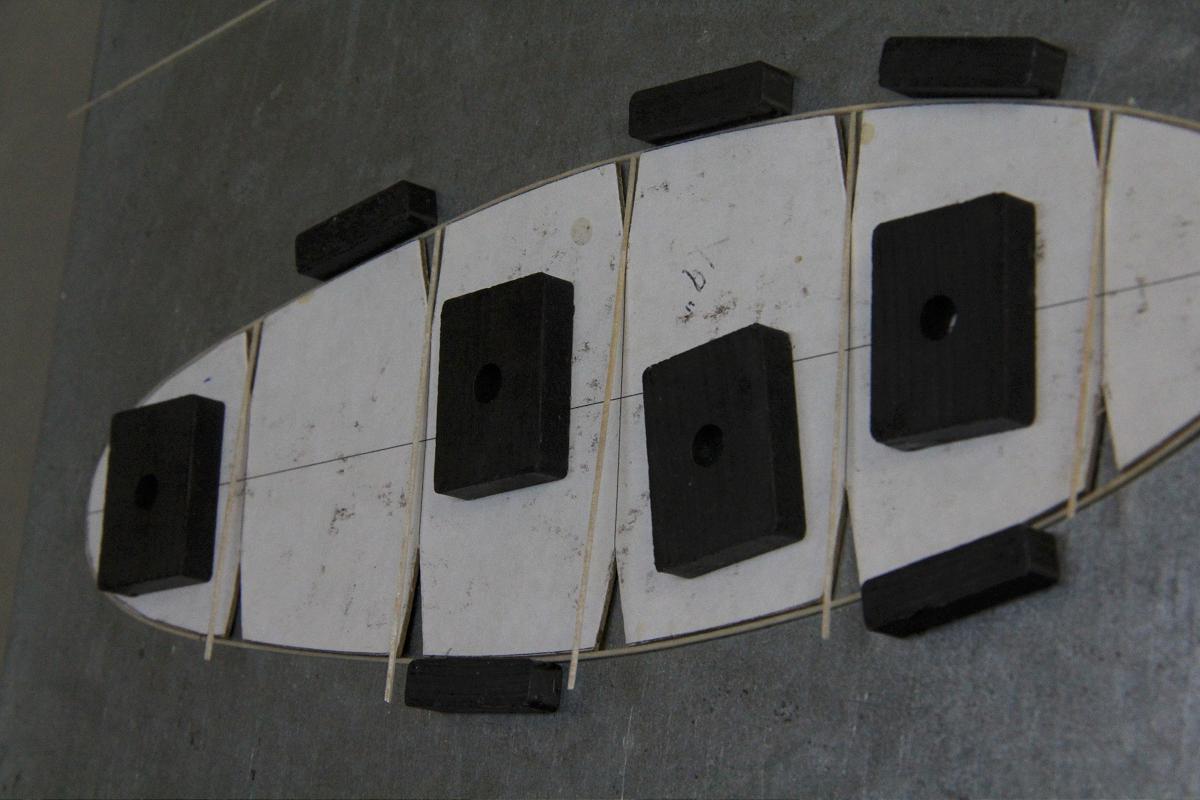
Prop outline with flat ribs attached
I build on a piece of steel with magnets. The larger ones hold down the forms, the smaller ones are used to keep the balsa in place. Here instead of using sliced ribs, I used flat pieces. First, I glued all the ribs to one side of the outline.

Outline with all flat ribs attached
Here, all of the ribs are glued down. The ends are left loose and trimmed.
Attaching boron
Next, the boron is attached here with a brush dipped in acetone. A bit of thinned Ambroid could also be used to ensure attachment at the end.

Attaching boron #2
I use my fingers to align the boron and hold it down. Then I brush on more acetone to attach the boron. The brush should be pretty ‘wet’. Just be careful around the rib glue joints. It may be useful to mark the rib joints in case they come loose.

Attaching boron #3
Once you get down to the tip, work in smaller sections. Thinned Ambroid can also be useful here at times. Keep working in small increments, just 1/4″ at a time or so.

Around the tip
I try to keep the boron as centered as possible – Keep working in small sections here.

As the radius gets smaller…
It becomes easier again and you can do an inch or two section at a time.

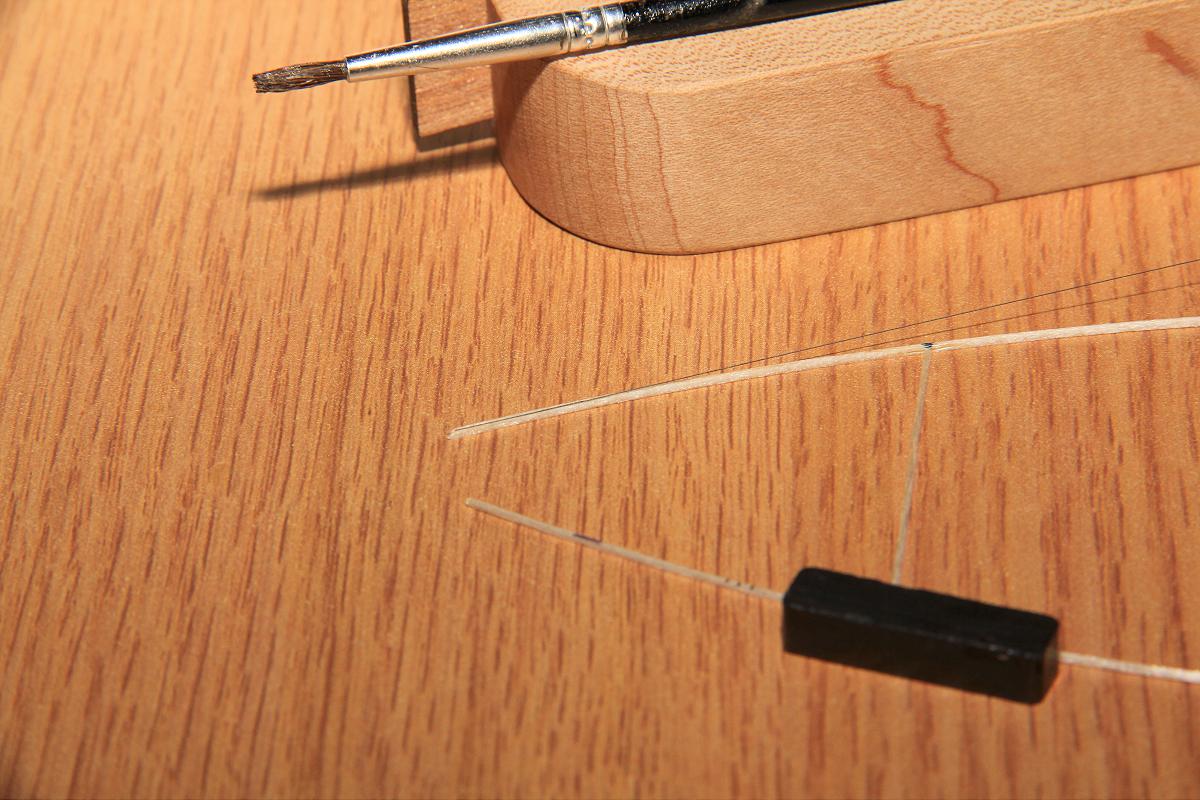
Capping the ribs
I’ve used 004 boron for the inner two ribs here as the spar will not go to the end. Not sure it is necessary. I have the boron slightly overlap the glue joint to give some extra strength. Thinned Ambroid helps here occasionally. An Xacto blade can be used to ‘break’ the boron at a particular place – just bend the boron against the blade until it snaps. I don’t tend to get fragments this way, but if they do occur the glue on the boron typically holds them in place.
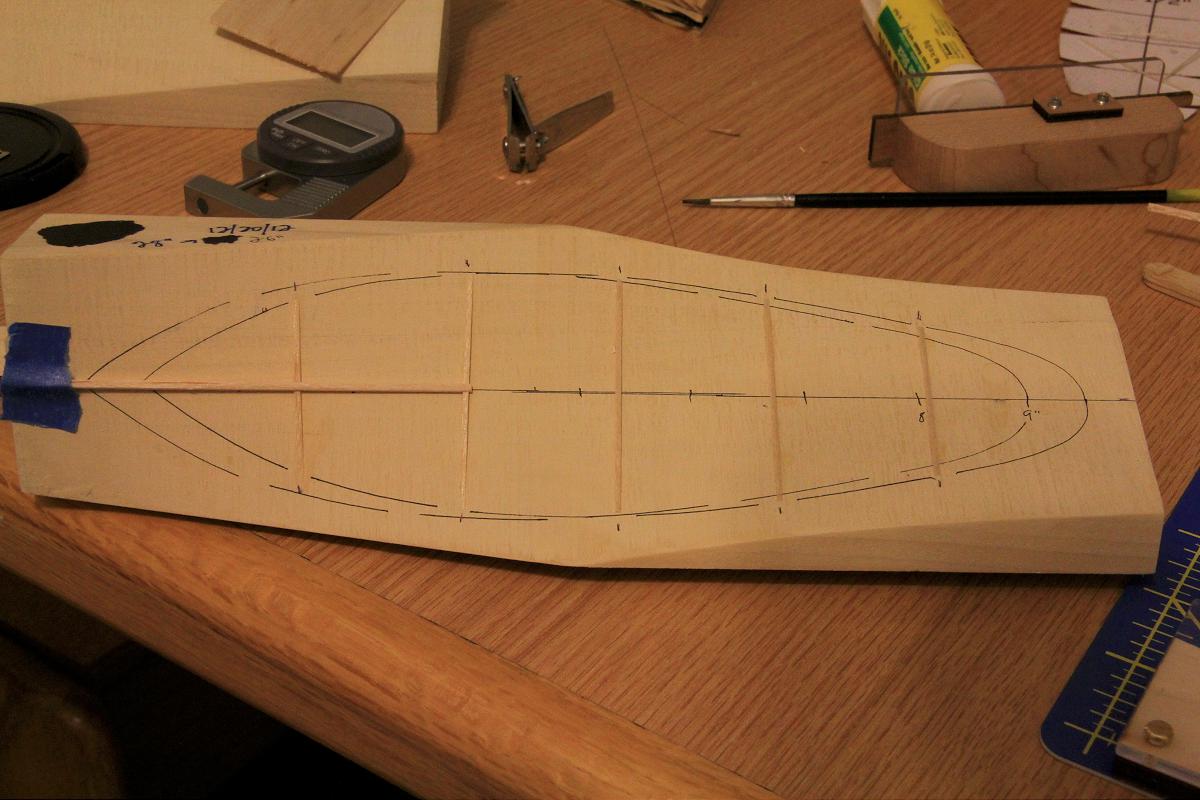
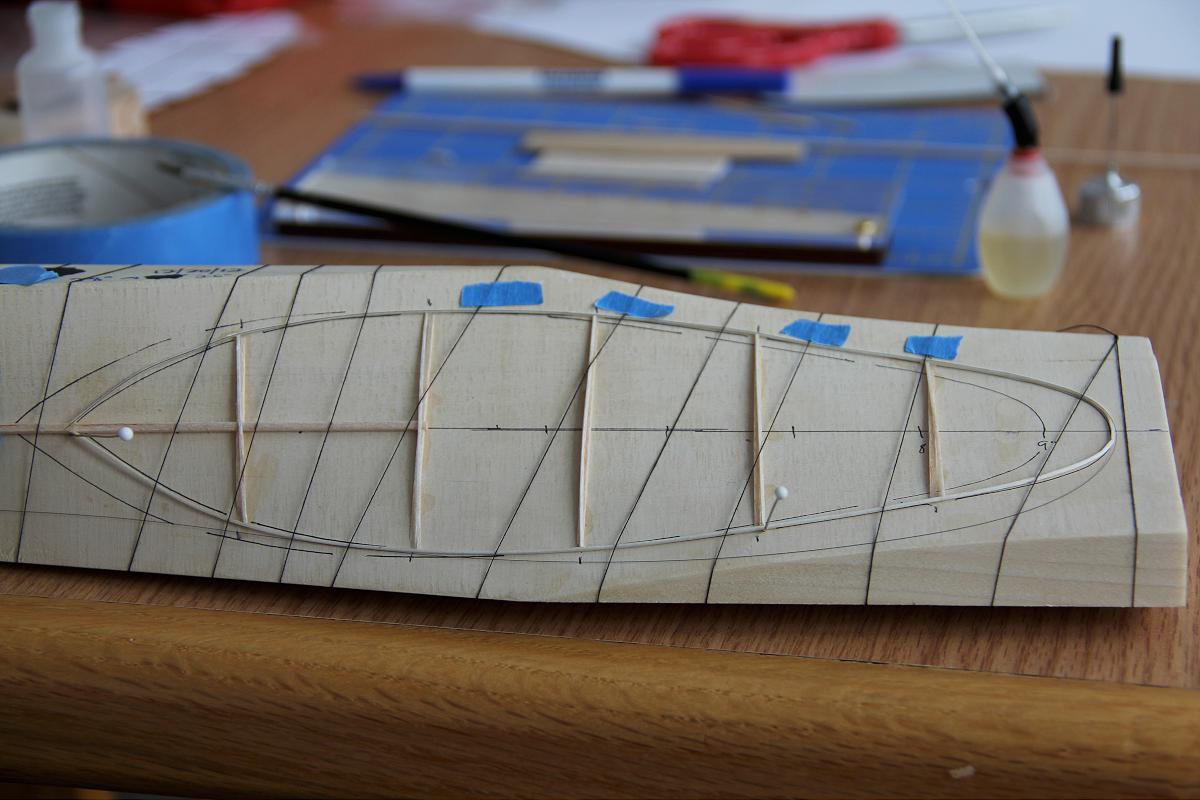
Preparing the prop block
Pictured here is a prop block I cut on my fixture. I have marked both the outline and the rib locations and cut out some 3% arc sections, gluing them to the block with thinned Ambroid. On the inner two ribs I cut a bit out to hold the spar in place. The spar stands slightly proud here, so 5% might be better here.
Not pictured – The entire outline is placed in a tray of water and soaked for several minutes. It comes out all bent as the balsa expands.
HINT: It might be wise to use some wax or Scotch tape on the line of the outline before this next step.
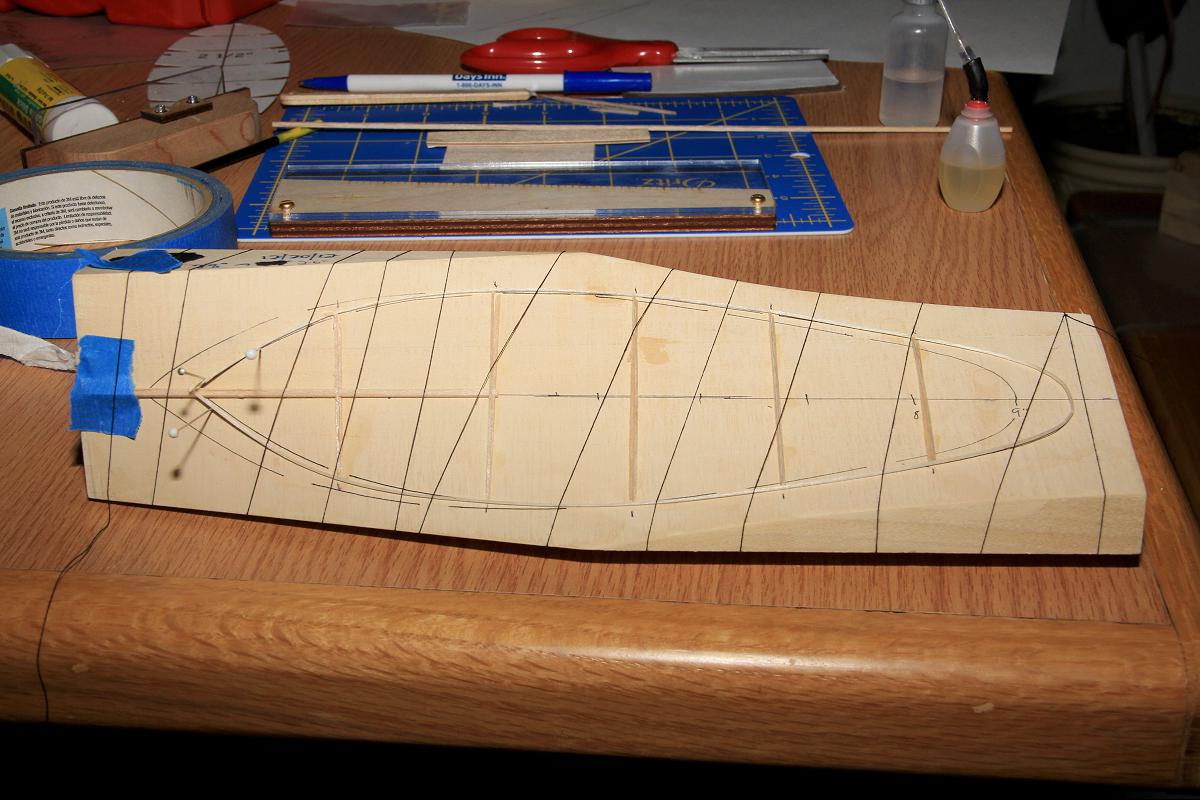
Thread wrapped wet outline
Place boron side down, adjust to the line and wrap with thread. If there appears to be any lifting off the block, add bits of tape to the thread right next to the outline to keep it tight. Secure the end with tape. I like to use thin silk pins, because they press pretty easily into the Poplar block. You typically just need them near the spar/outline joint. Let dry thoroughly – best not to use heat (oven) here.

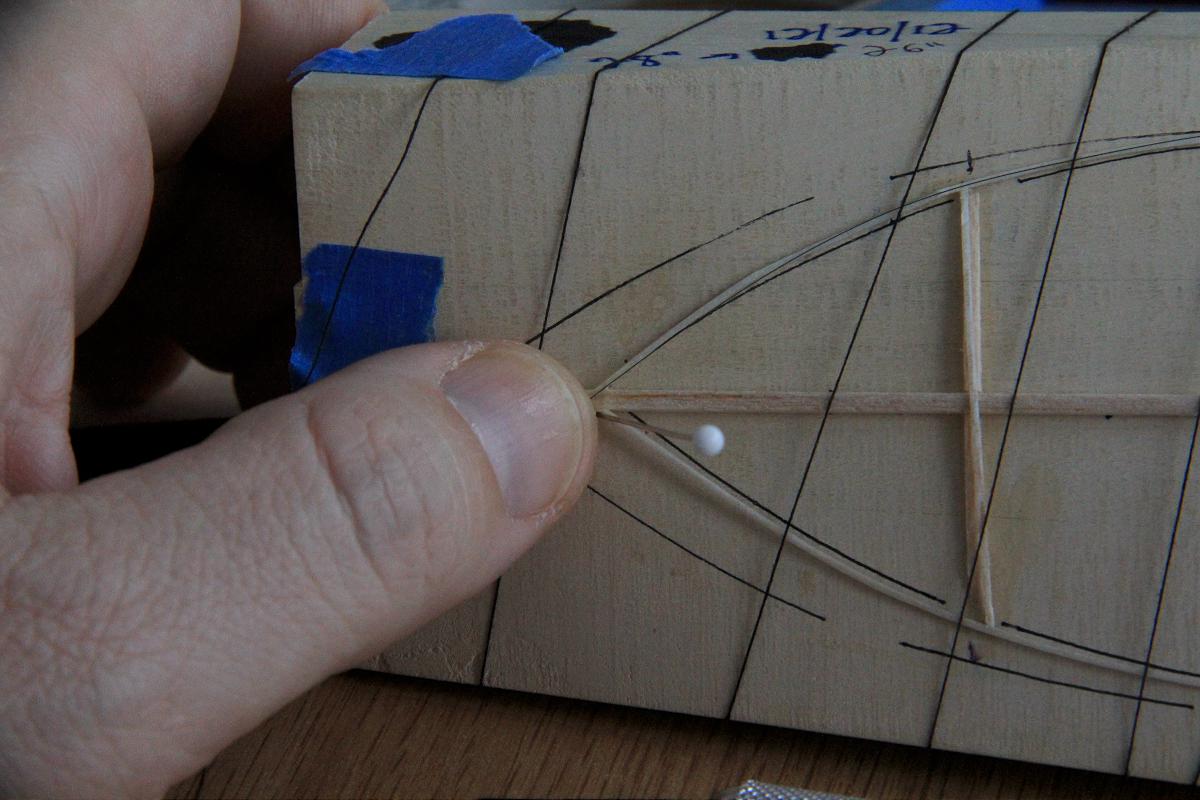
Slice ends of outline off
This one is not as in focus as I would like but a bit of boron is sticking out past the angled slice. Insert the boron into the spar wood being careful to align the top of the outline with the top of the spar. This is one of the most fiddly bits. Glue it up well and let dry.
Attaching boron on top
Now we have to repeat the process attaching the boron on the top side. First, slide the boron underneath all the threads at the top. Bend it down so it approximates the arc of the outline and glue well here. It will overlap the spar/outline joint. Use thinned Ambroid if necessary to glue it down here.

At the tip
The rest is amazing similar to doing the bottom side. Brush on acetone while holding the boron in place. When you get close to the tip, loop the boron around underneath the lower threads.
Starting on the bottom
Pictured above, is the outline with boron looped underneath and ready to begin gluing.
I omitted taking pictures capping the ribs. I found it best to start at the top with some thinned Ambroid, let dry thoroughly, then bend the boron to the rib outline and use the brush dipped in acetone to attach it.
Be careful when separating the outline from the block. A thin razor blade can be useful if you happened to accidentally glue it to the block.
At this point the blade can be covered normally. I have not had any problems with the boron popping loose to date. If it does occur, a bit of acetone should reactivate the glue – or it could be glued down with very thin Ambroid.
I suspect that the 5# 0.025″ is too heavy in this application. I would try some 4# 0.020″ wide (keeping the distance between boron at 0.025″) to lighten the outline. I assume the ribs could also be done somewhat differently to shave some weight.
Two last points: All boron was 003 except for the top/bottom of the two innermost ribs. I cleaned the boron with paper towels dipped in acetone first, then used one of Ray Harlan’s glue pots to apply the glue ahead of time. I will typically do 10 or so boron this way and leave them taped up to the wall until needed.
Source: http://www.indoorspecialties.com/contents/en-us/d40.html

Ray’s glue pot filled with Ambroid

Boron inserted into glue, sticking out the bottom hole.
Take good care of the glue pot, soak in acetone when needed. A 0.013″ wire will help keep it clean.
Hoping you find this helpful!
Mike Kirda


I have been working on a new prop and have some slightly updated info.
Instead of boron capped ribs, I went back to the standard 0.025″ square sliced ribs for ribs 3,4 and 5.
For ribs 1 and 2, I sliced some 0.013″ leftover motor stick wood to 0.030″ wide. A preglued 004 boron was glued on one side (as near to center of the 0.030″ bit as possible) using a brush dipped in acetone. After this the boron side was laid down on top of an arc form. Some thread was wrapped around to lay it down into the curve, then another 004 boron was carefully laid on top and glued down with the same brush in acetone trick. These ribs are quite stiff.
Again a spar went only out to Rib #2.
Regards.
Mike Kirda