
The Event will run through 2/28/21
The Hallway Harrier Lightweight Walkalong Glider
Introduction by David Aronstein
As we are now in our 2nd Indoor season to be impacted by the coronavirus pandemic, here is another building project and flying challenge that you can accomplish in your home. This one is a Walkalong Glider.
Walkalong gliding is slope soaring, over a moving slope. The slope is typically a cardboard or foamcore board, held by the ‘pilot’ who is walking behind & keeping the slope under the glider. Most of my walkalong gliders are semi-scale stick-and-tissue models, fun to fly in larger areas but too fast for a house. This one is designed to fly easily in your house or apartment.
The Hallway Harrier is named for the bird, not for the VTOL jet fighter (which was named for the bird). Harriers are efficient gliders, like hawks. As they cruise low over the fields, hunting for prey, their flight is a little bit like the flight of walkalong gliders. (Although they manage to do it without the help of a board!)
Building the Hallway Harrier
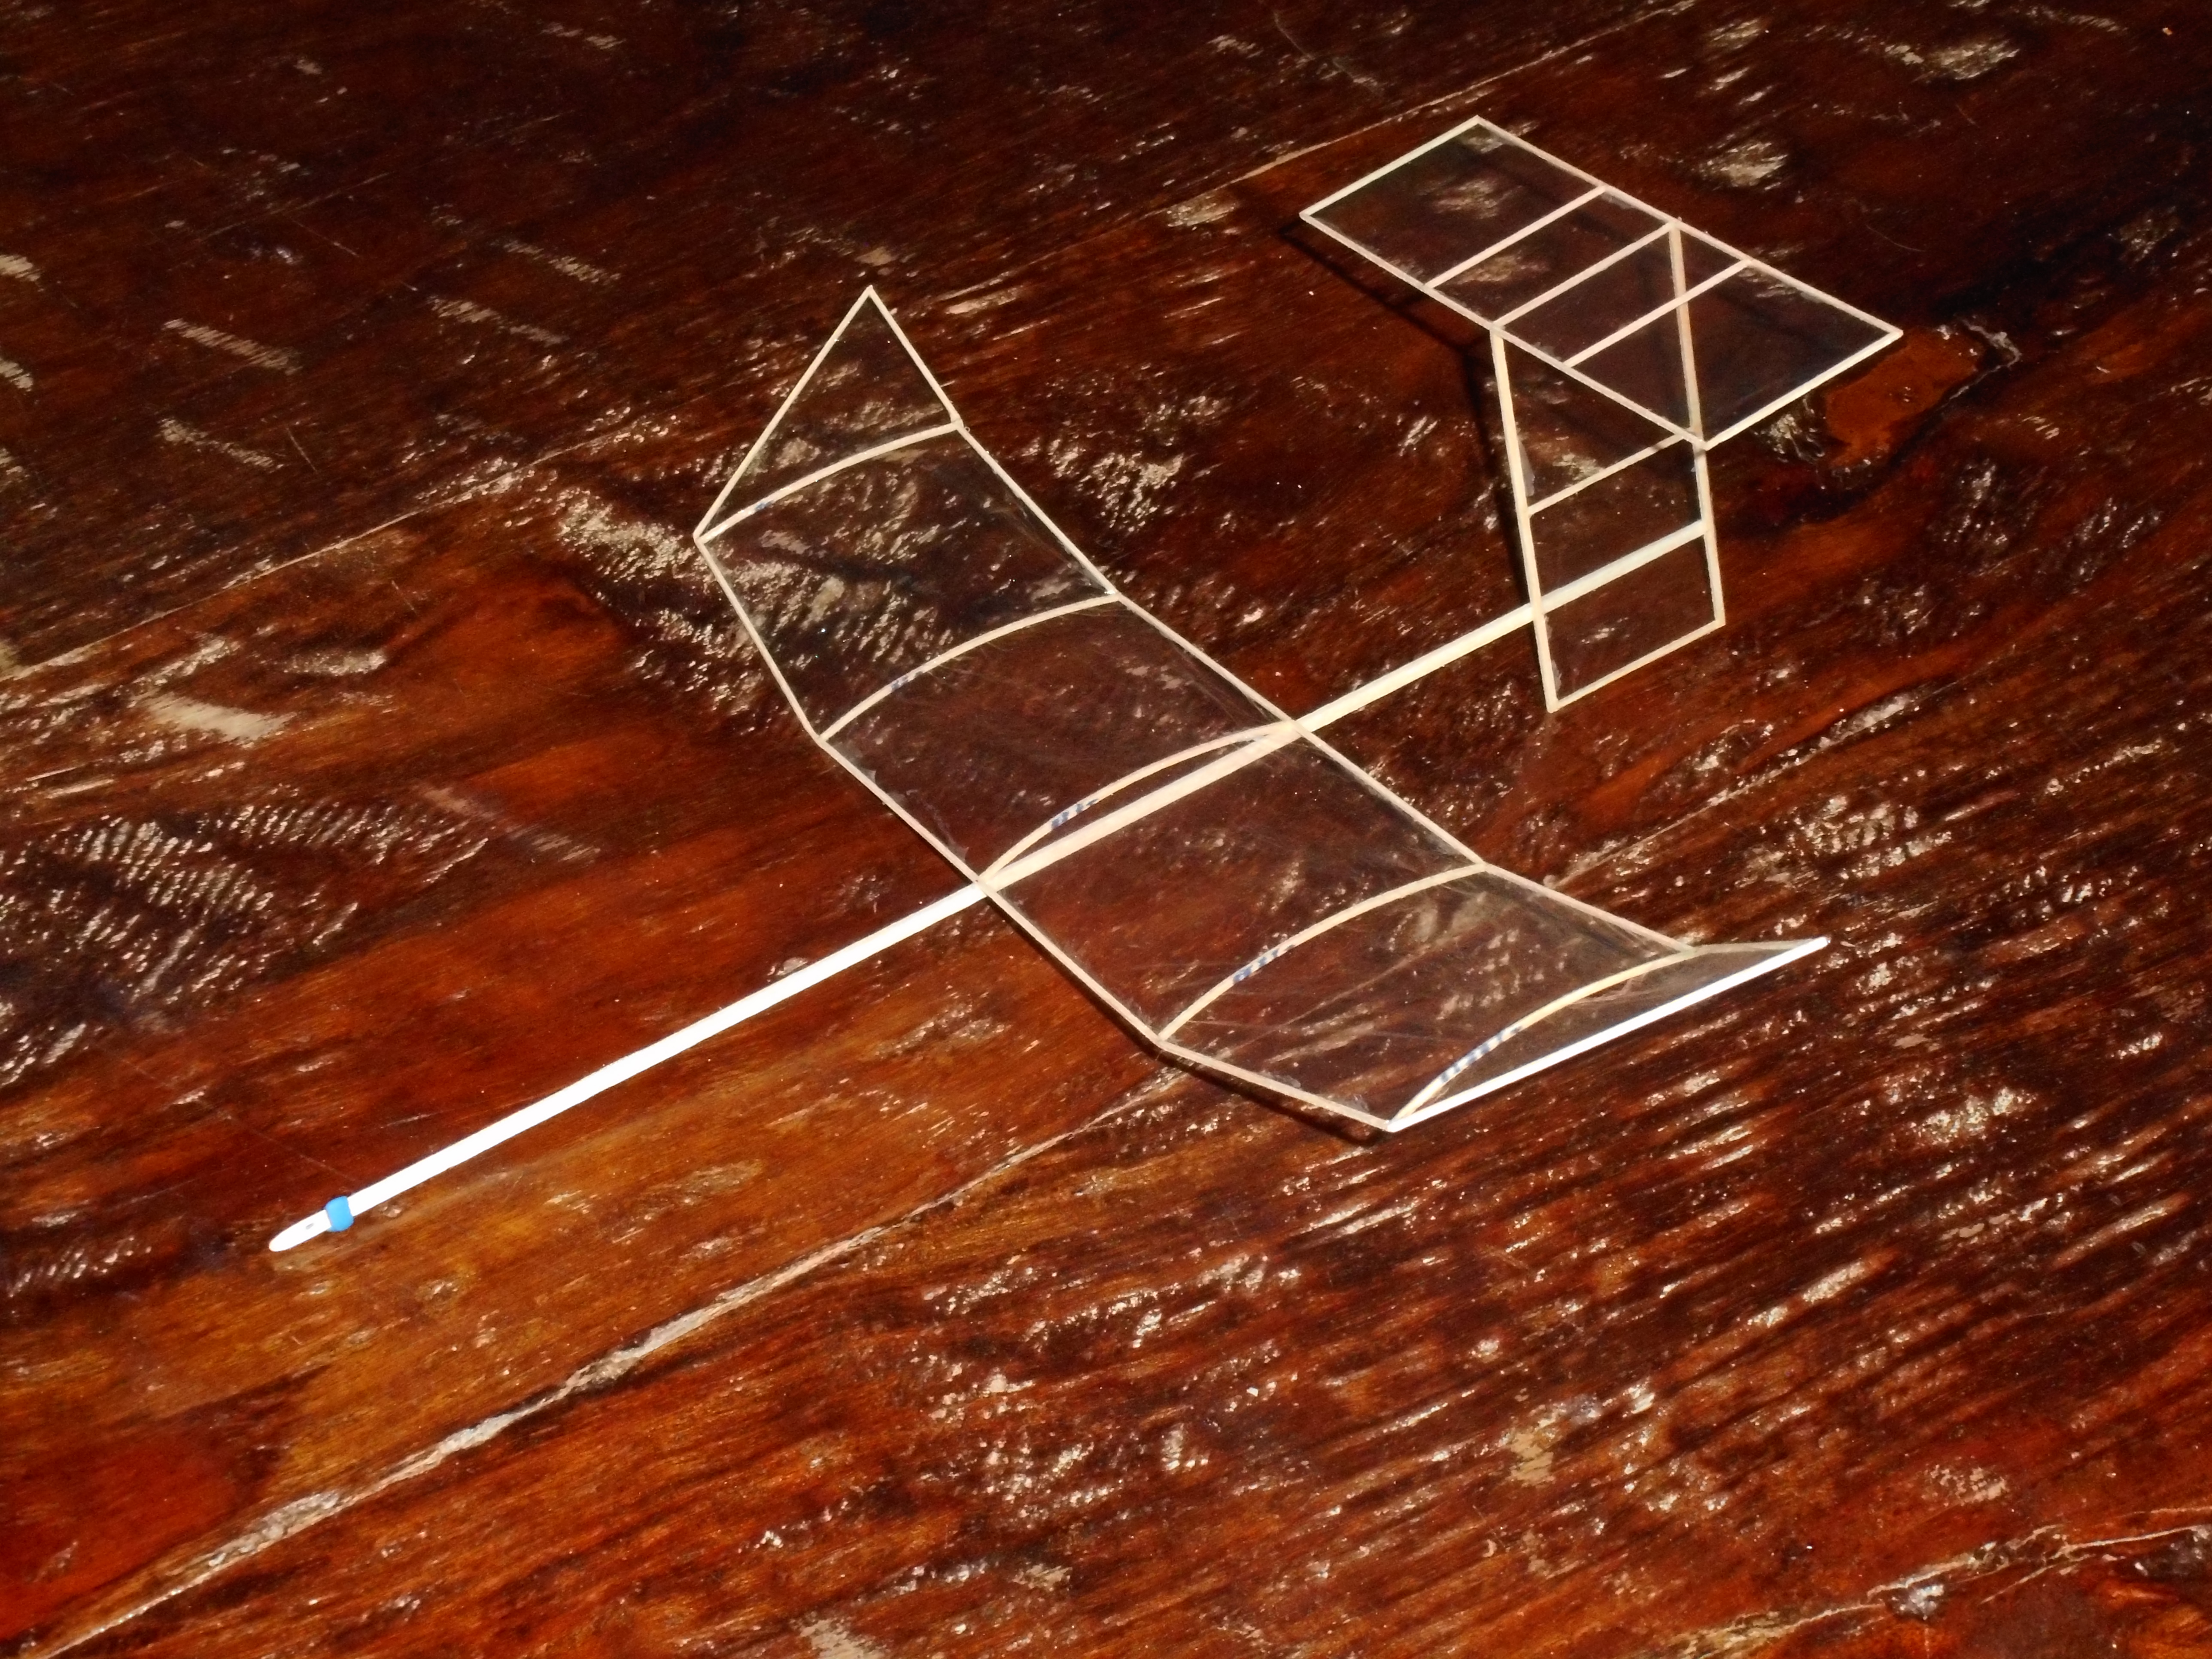
Build the Hallway Harrier just like any small Indoor FF model – ministick, parlor mite, Scraps, etc. Main construction material is 1/32” square.
Wing: I like to use fairly deep camber. If you have your own favorite airfoil, you can use that instead. The plans show spliced dihedral joints, but feel free to make them by whatever method works for you.
Tail: The vertical tail spars are 1/32” x 1/16” for added strength and stiffness, because of the T-tail configuration. The top rib of the vertical tail is exactly the same length as a horizontal tail rib, as you will mount the horizontal tail to it. The lower vertical tail rib is a little shorter. The vertical tail is a bit unique, in that you only cover part of its span. The part below the lower rib is just there for height, and should not be covered. Also, be sure to build in the full –8 deg tail incidence as shown on the plan! Walkalong gliders need more incidence than regular free flight models.
Assembly: After all the flying surfaces are built and covered with your favorite film, assemble in the following sequence. First mount the horizontal tail to the top of the vertical, gluing securely on all of the contacting surfaces. Make sure it is square as viewed from the top, and from the front (or back). Then mount the vertical tail to the side of the fuselage, making sure it is square as viewed from the side. Finally glue the wing to the top of the fuselage, making sure it is level with the horizontal tail, when viewed from front or back. If you absolutely don’t feel right building an indoor model without wing posts, go ahead and mount the wing on posts. But keep them short (1/2” or less).


Click here to download a PDF of the plan.
Flying the Hallway Harrier
Trim for a smooth glide. Noseweight is the primary adjustment. A very slight stall in the ‘free glide’ is OK, as the influence of the board may correct that. The goal is a straight glide. If your model has a strong natural turn in one direction, add a small rudder tab (~1.5” high x ¼” chord, 1/64” sheet) to correct it.
Now for the board. There are two primary ways to launch; experiment to see which works best for you.

Walking start: Hold the glider 6” to 12” above, and with the wing 6” ahead, of the top edge of the board. The board angle must be steep, at least 45 degrees. Now walk at approximately the same speed as the free gliding speed. Point the glider’s nose slightly down, and release the glider. If the speed and launch attitude are just right, you are flying! If the glider immediately gets ahead of you, try it faster next time. If the glider immediately falls back behind the board, try it slower, or point the nose down more.
Free Glide start: Alternatively, launch the glider from as high as you can reach into a free glide, then come up under it with the board. This may be easier if you are having a hard time finding the correct speed for the first method. As with the first method, the board must be steep. Do not approach the glider from behind; this will only push it into a dive. You have to come up from below the glider.
Once you get it flying, work on maintaining altitude and making smooth corrections from any disturbances. Then work on turning, and climbing. You turn by sliding the board to the side you want the glider to turn away from; possibly yawing and/or rolling the board as well.
My prototype initially had a taller vertical tail, fully covered. It was very tricky to steer because once you got it turning, it would turn too much, often flying right back into the pilot or the board. After modifying to the configuration shown on the plan, steering is much better. Nevertheless, it is good practice to plan ahead: as soon as you start a turn, start planning how and when you will come out of it.
Avoid the following common mistakes:
- When launching, always hold the glider from behind and below. A common mistake is to try to launch it with one’s hand above or in front of the glider, which often results from picking up the glider after a landing. The pilot’s hand will disturb the airflow and prevent a successful launch.
- Keep the board steep. Learn to recognize and avoid the common tendency to flatten the board. You get no lift with a flat board.
Finally, since many of us Indoor modelers are fairly ‘mature’… take it easy! This is great exercise – walking, coordination, balance, mental focus – but don’t overdo it initially.
Challenges
A straight duration contest does not really work, since walkalong gliders can theoretically stay aloft indefinitely. So here are a few challenges to work on:
- 30 second flight
- 60 second flight
- Closed course, 3 laps. (It gets hard when you start Lap 2 and encounter your own wake!)
- Inflight handoffs from one pilot to another
- Flying without a board, using just your hands / head / body to generate slope lift.
- Design & build your own walkalong glider. This is not a one-design contest! The Hallway Harrier is offered as a design to get you started. There are no limits on design or construction.
Complete as many of the challenges as you can. NFFS and/or INAV will host some kind of scorekeeping. Details are TBD but should be released with this article. If there is enough interest, we may follow up with more advanced competitions.
Designing Your Own
Short-coupled, high-tail models, and tailless models, are easiest to trim ‘on the board’. Traditional FF configurations with long tail arms usually experience too much nose-down trim change because the tail, being closer to the board, gets more updraft than the wing. Also walkalong gliders need more decalage than regular FF models, typically 6 to 10 degrees. Besides basic longitudinal trim, you want the model to be easily steerable, which depends on the balance of vertical tail area and dihedral.
If you have a spare Scraps wing & tail – turn it into a walkalong glider! You might be able to fly one on a large board as-is, just swapping out the prop for some noseweight. But it will be easier to fly if you turn it into a T-tail configuration, bring the wing down closer to the fuselage, and of course take out all the turn adjustment. Be the first to send in a video?
Additional References and Resources
You can find a lot by searching for “Walkalong Glider” in Google or YouTube, but here are a couple of the most useful sites:
Slater Harrison’s walkalong glider site: https://sciencetoymaker.org/walkalong-glider-airsurf-air-surfing/ – patterns for paper and foam gliders, building and flying tips, foam sheets and pre-made gliders available to order (nonprofit and supports physics education!).
Phil Rossoni’s walkalong glider site: https://sites.google.com/site/controllableslopesoaring/ – designs, building and flying instruction, science project ideas, contest / game ideas, and videos. Several of my plans are on Phil’s site in the “stick and tissue” section.
David Aronstein, “Walkalong Gliders,” in the 53rd Annual Report of the National Free Flight Society, Symposium 2020, pp. 101-116. (Copies available from NFFS Publications Services; email nffspubs@yahoo.com).
National Free Flight Society (NFFS) YouTube channel: https://www.youtube.com/channel/UCucmaPRq2ws6rRTMHX_38YA
Indoor News and Views (INAV): https://indoornewsandviews.com/


Leave a comment