 Click here to download a PDF of the flyer.

Custom F1D Travel Boxes
Custom F1D Travel Boxes
By
Mike Kirda
When I first built an F1D, I used a large cardboard box for transporting my planes. This works out well for local contests although the box is large and unwieldy. For airline travel it is impossible to use. I have been admiring the travel boxes of John Kagan and Brett Sanborn for years now. They are very nicely designed and work well for them. The issue I had is that I don’t have a decent table saw so that level of woodworking for me is very difficult to do.
At Kent last year Kang Lee showed up with this beautiful F1D travel box. This was all wood with front/back plastic panels. I was really impressed with it. He pointed me towards Jake Palmer. Jake has no website, only e-mail. We went back and forth a few times and talked about the wood choices and box size. Jake can offer boxes fully finished or as a kit for self-assembly and self-finish. I cannot quote prices here as they will not be accurate from box to box. Wood choice will dictate cost to a large degree, plus the labor can vary from wood to wood.
In my case I chose to get two kits made from Cherry, one for myself, one for Jeff Annis. The parts arrived and it took me quite a while to glue them up and get them sanded down well, then finished. If I had to do it over again, I would have Jake finish the boxes for me as it would have been cheaper overall. On the other hand, I learned a lot, I have a really nice random orbit sander now, and I have a greater appreciation for wood working and fine finishes on wood. I redid the finish on mine three times before I was satisfied with it.
If you do go to finish one yourself, I cannot recommend a random orbit sander enough. A normal ¼ sheet sander may take an hour to do a corner after gluing whereas a random orbit sander takes all of five minutes. For finish 3-5 coats of 1:1:1 mix of polyurethane:boiled linseed oil:mineral spirits works really well, just make sure to wait at least 48 hours before sanding with 400 grit between coats. A final coat or two of 1 part poly and 1 part mineral spirits, rubbed down with 0000 steel wool and finished off with several coats of Minwax wood polish makes it shine with wonderful depth. Thanks to Jake for suggesting that one for me.
Attaching the plexiglass sheeting is a bit tricky. I used stainless steel wood screws, size #4 x ½”. The plexiglass should be drilled with a #6 countersunk bit. The Snappy brand worked well for me. Just go as slow as your drill can go while drilling the plexiglass. When you get through, pull it out to remove the plastic tailings, then finish slowly. If you don’t remove the tailings, then tend to melt. I spaced the screws out between 3.5 and 4” apart.
Jake’s contact information is 82.jake@gmail.com
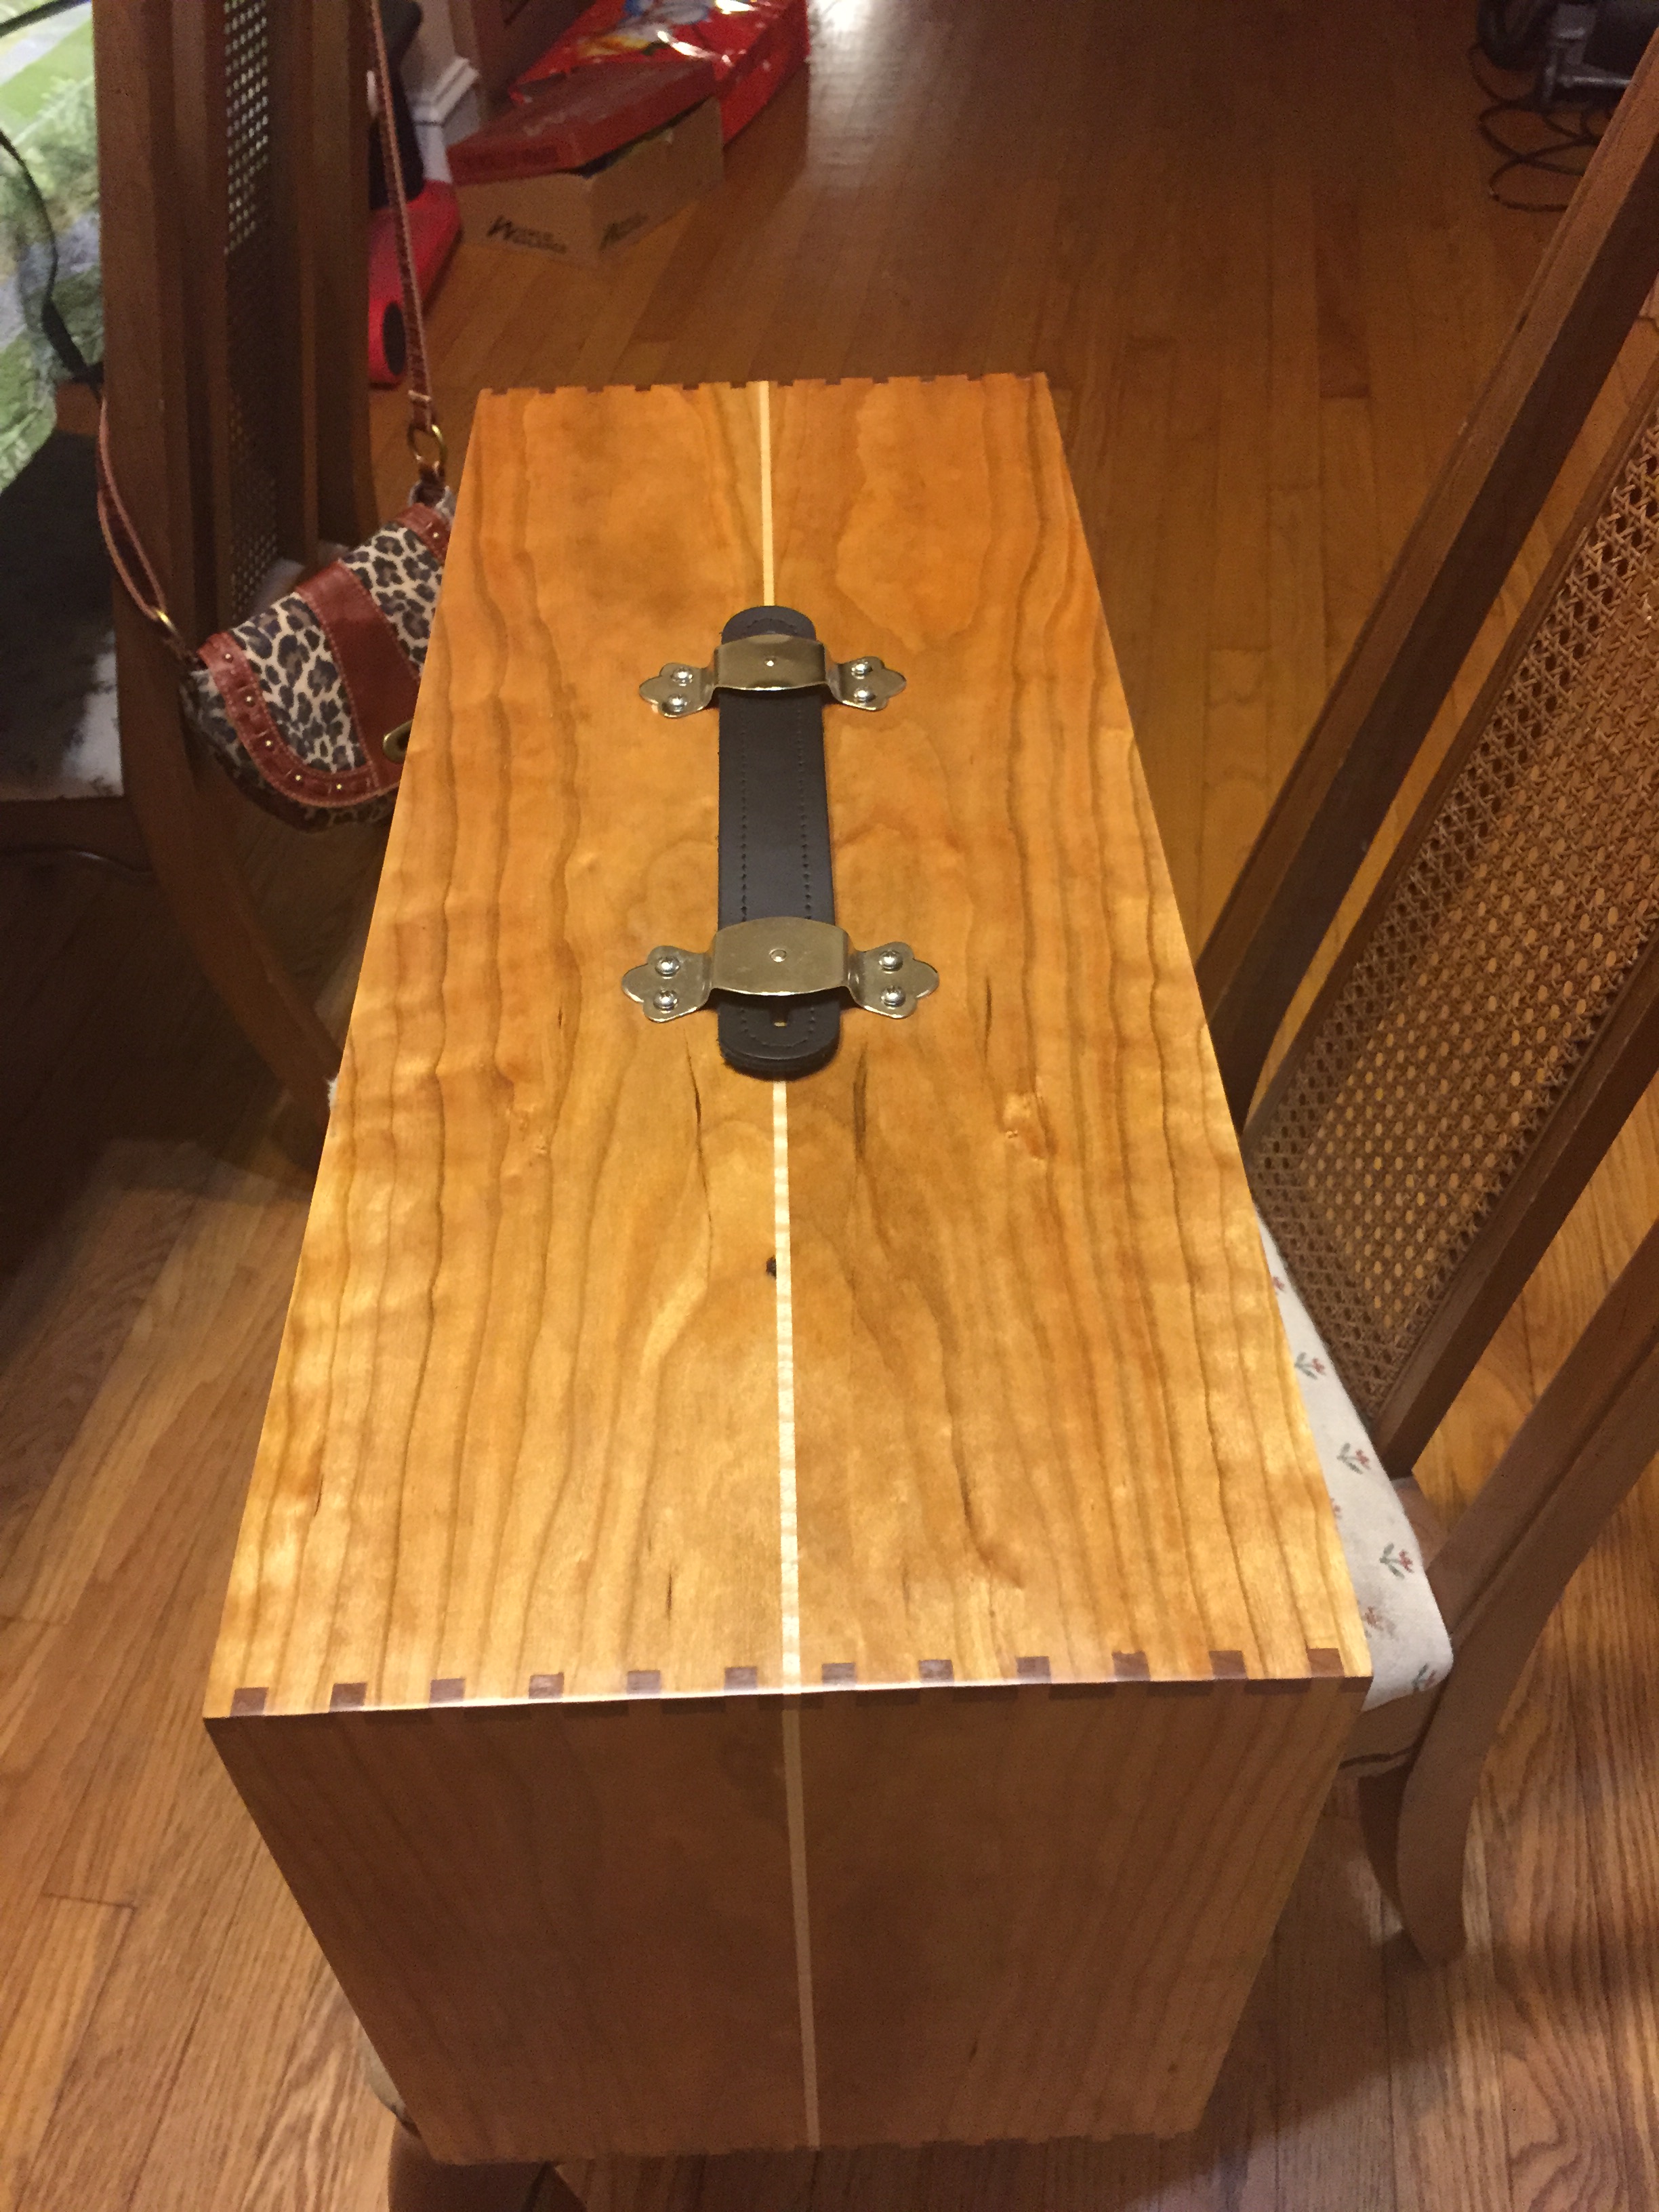
Cherry Box -Top View

Cherry Box – Side View
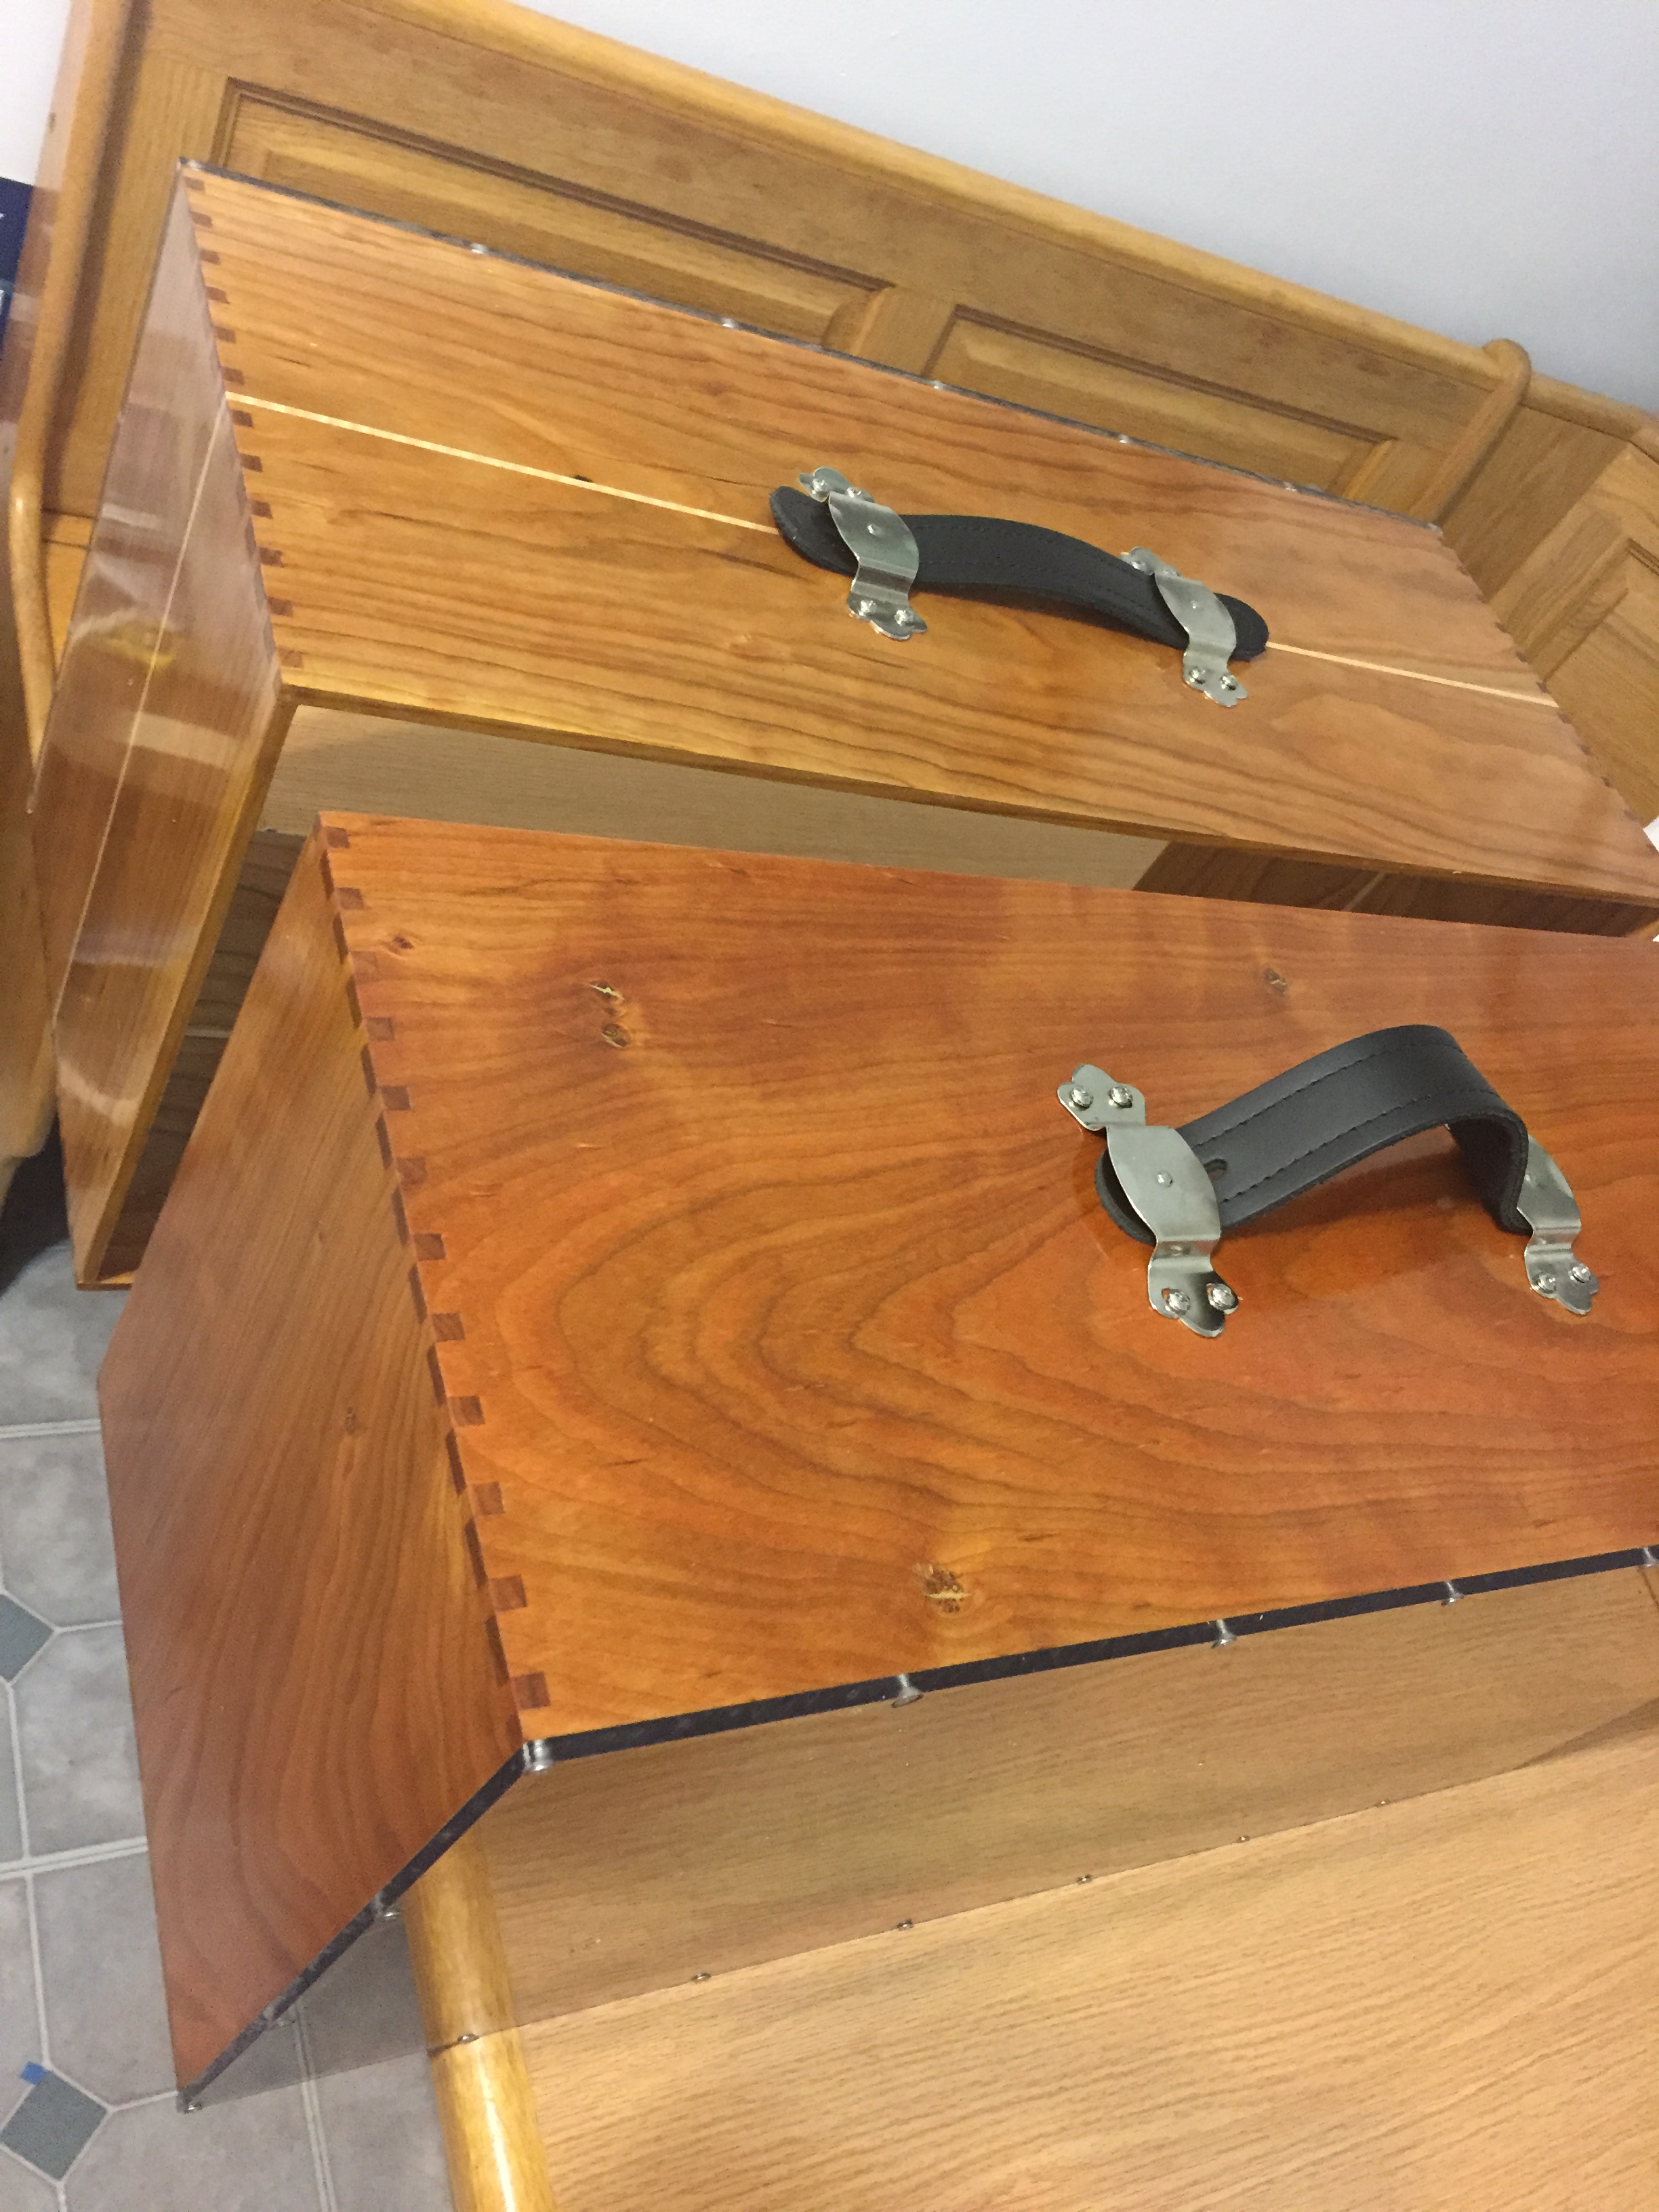
Cherry Boxes
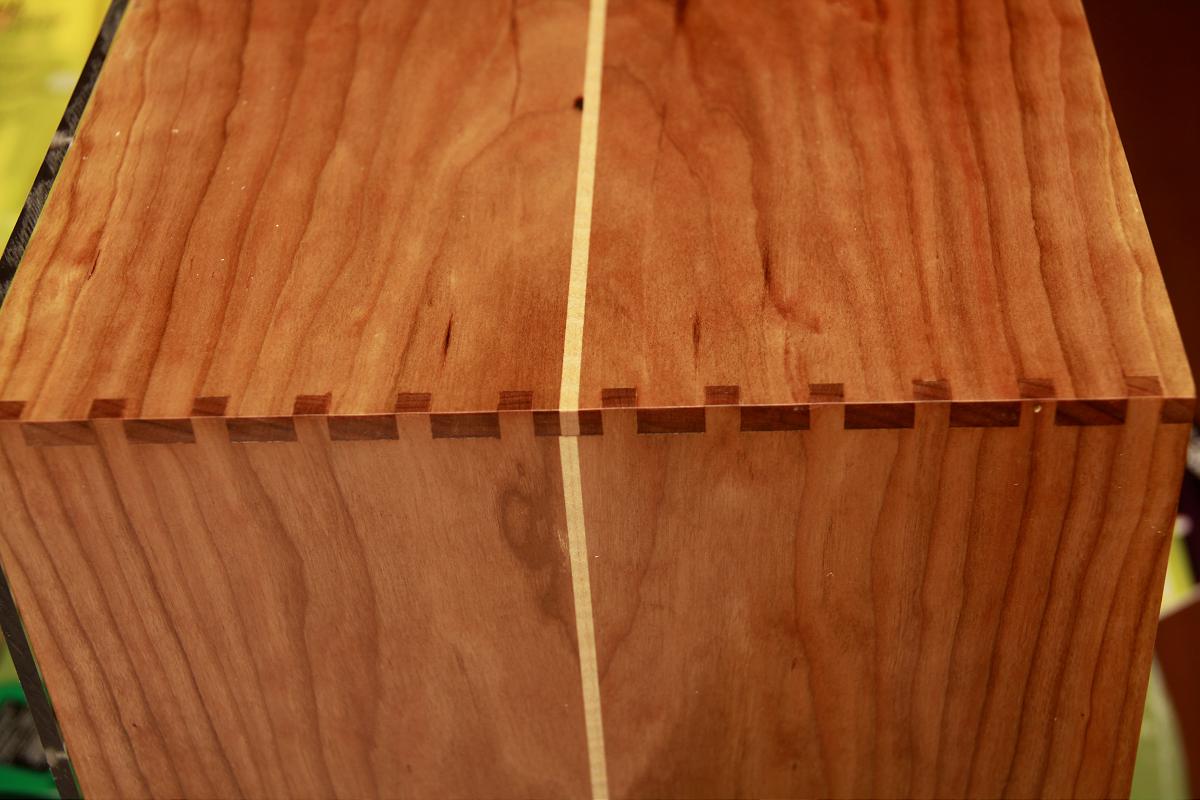
Corner Detail
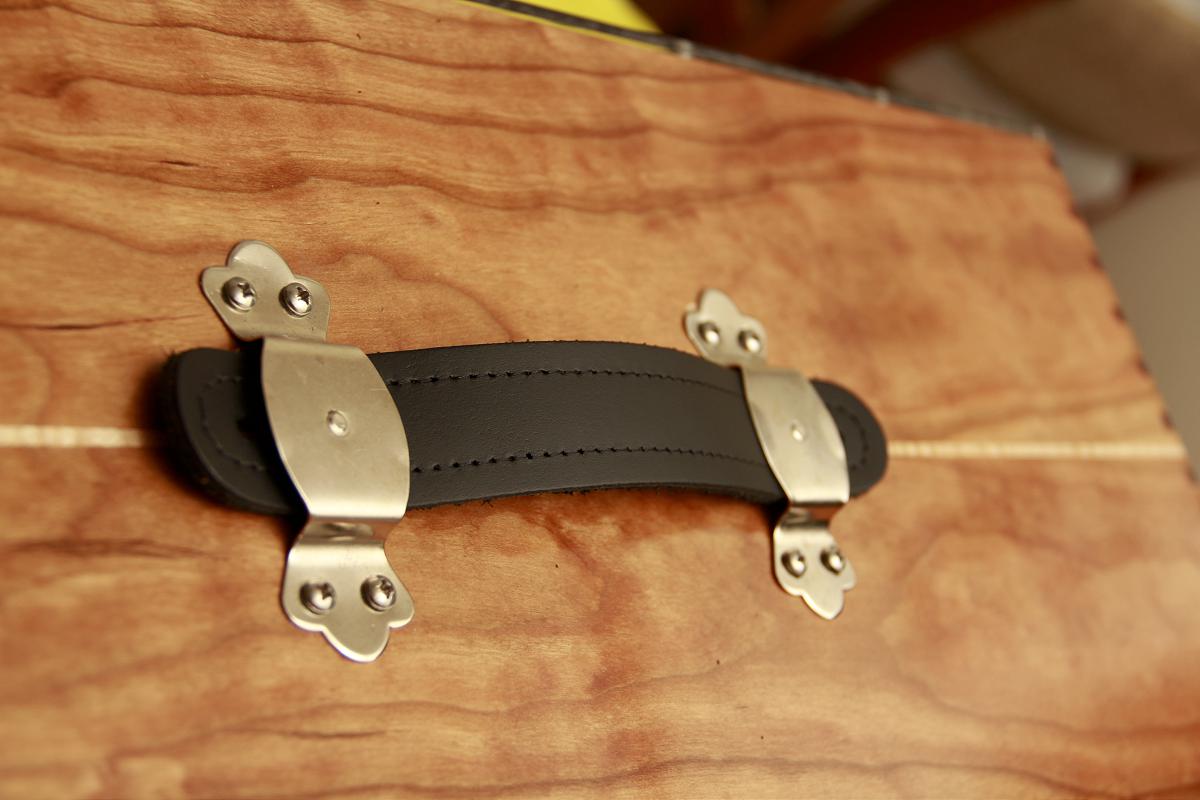
Handle
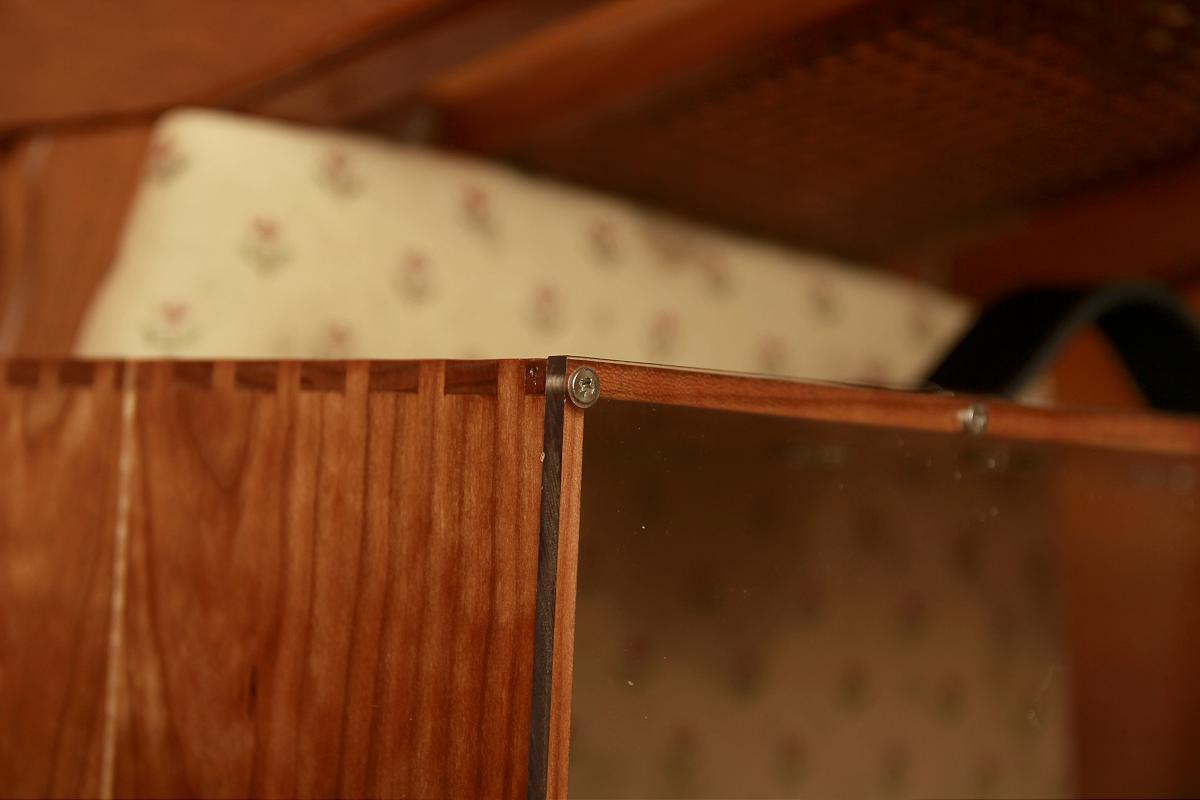
Plexiglass Attachment and Corner Detail


Ivan Treger’s 2014 World Championship 3rd Place F1D
Ivan Treger’s 2014 World Championship 3rd Place F1D

Click here to download a copy of Ivan’s plan.
INAV Thanks Bernhard Schwendemann of Willkommen bei der Thermiksense and www.volnylet-freeflight.cz for allowing us to republish this plan. INAV also wishes to thank Steve Brown for his work on obtaining a copy of the plan.
CAP – Flying
CAP – Flying
Uwe Bundesen won the first CAP-contest in Europe. The contest was held within the German Champs for Indoor Models in 2014. There were seven competitors. The best flight times were over 5 minutes. Cap – flying is becoming popular because it overcomes some awkward properties of model impulse. Supercapacitors are cheap and readily available from several sources.
INAV thanks Dr. Heinrich Eder for reporting on the contest.
 Click here to download a PDF of Uwe’s plan.
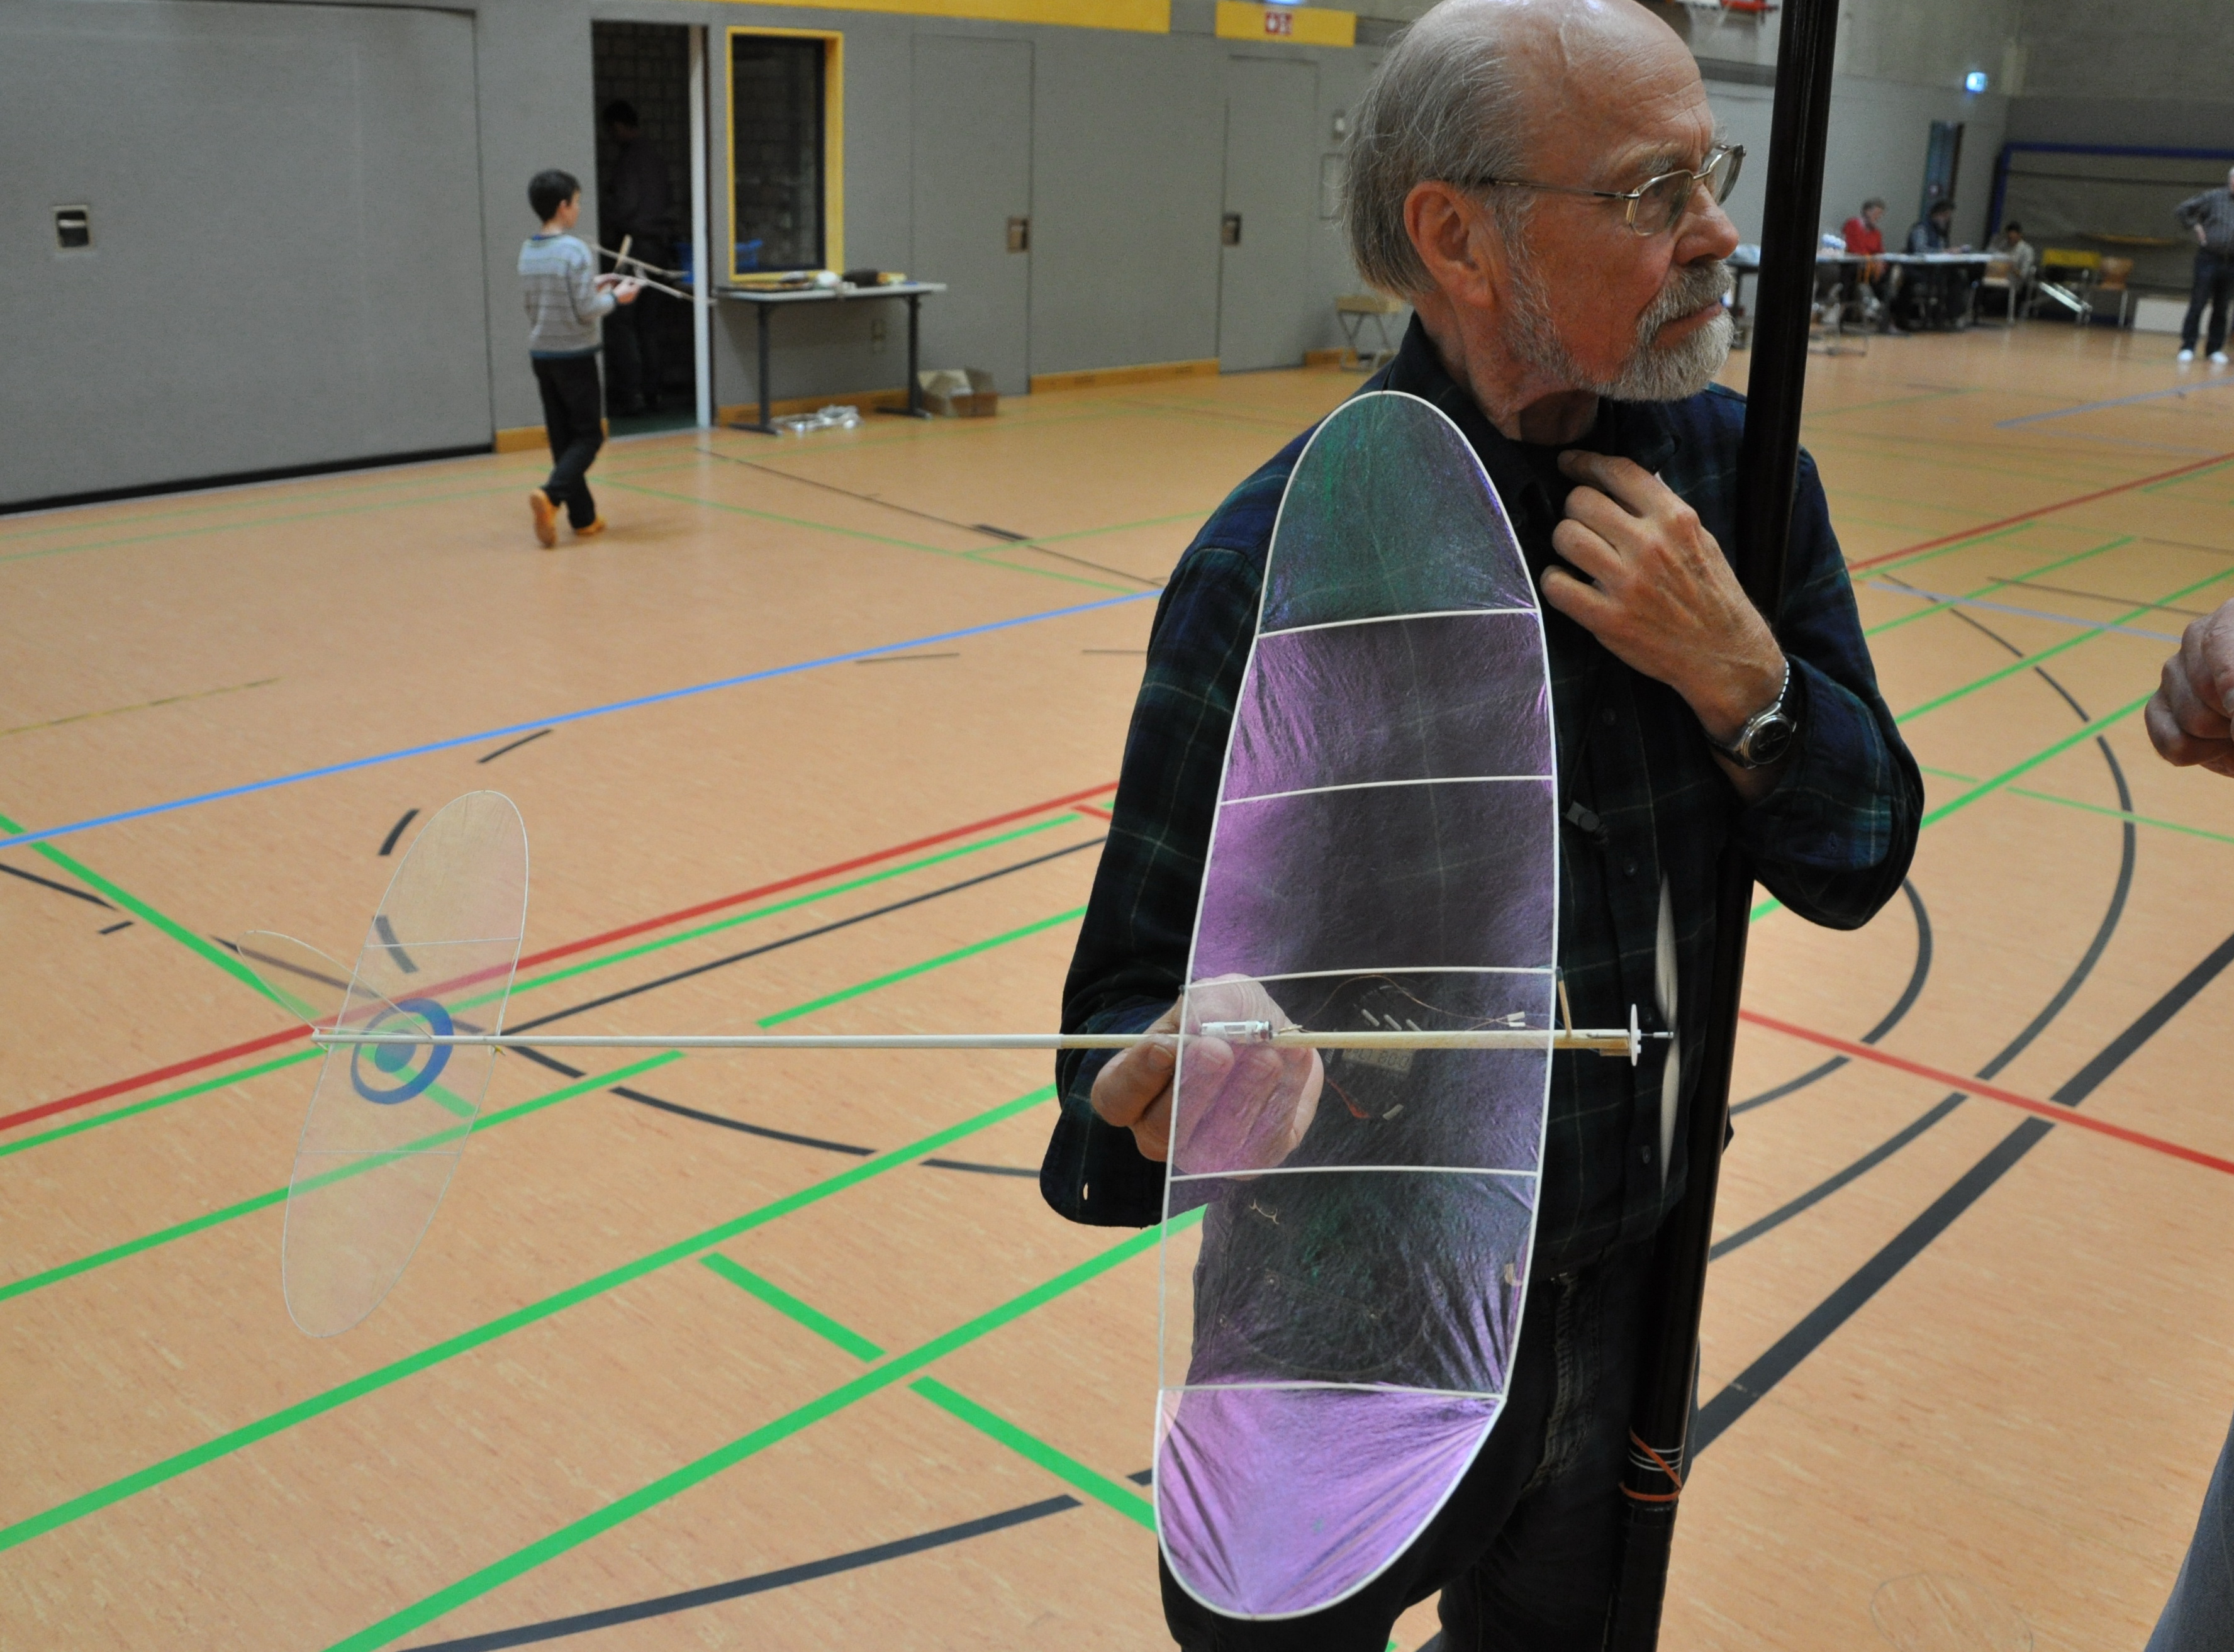
Uwe Bundesen with his 1st place model.

Uwe’s model near the ceiling
Guidelines for Spectators
My first time at West Baden two years ago, I lost an F1D to a spectator who grabbed it out of the air after a prop tuck.
Flying there was wonderful – lots of questions, lots of interest from the dozens of spectators. At the time I thought we should really have something posted that explained what we were doing. Even better, if we had posted information at all of the entrances and included a table set up with different model classes. We could have used the time for education and potential new flyer recruitment. Informed spectators may not destroy more models.
Earlier this year I found myself again at West Baden. And realized that even though I had talked about this to several other flyers, none of us done anything to make it happen. Nick pushed me a bit, I wrote something up and got some feedback. It sat again for several months until Nick pushed me again. I approached a co-worker who really is a great wordsmith and asked her for help. The promise of homemade cookies probably helped. So with special thanks to Elizabeth Harmon Miller for her edits, and to Nick for keeping at me, this is what I came up with. Feel free to edit, personalize and use at any indoor flying event.
Welcome to the wonderful world of Indoor free-flight model airplanes.
We are hosting a competition here today. To the ____________ you can see some example models of various classes.
The Academy of Model Aeronautics has created classifications based on ceiling heights. This building is a Category ____ site, with a ceiling height of ________ feet. (Add comment: The West Baden Springs Hotel atrium is considered to be one of the premier Cat3 sites in the world.)
We love to talk about our models, and of course you can take pictures.
Maybe you’re wondering …
What are the model planes made of?
The models are built with balsa wood, and most are covered in a thin Mylar film. Some use bracing wire made out of tungsten that is 1/3rd the size of a human hair. Some use composites like carbon or boron fiber.
How are the models powered and controlled?
All of them are powered by rubber bands and, once we launch them, we can’t control them. We are allowed to steer, however, and you might see folks use balloons or long fishing poles to do this. We also use them to retrieve models that occasionally get stuck. Please excuse us if we suddenly walk away from a conversation to steer; things can change rather quickly.
Why do the props turn so slow?
Because the models are very light, the propellers are very large, and there isn’t that much turning force in a tiny band of rubber.
Where can you buy these models?
You can’t buy them, so we have to design and build them ourselves. Some models can take up to 60 hours to build and fly at walking speed. If you see us shuffling along with a large model, it is because walking too quickly can destroy it. That’s how fragile they are.
How do you win the competition?
The model that stays in flight for the longest time wins. {enter details about most impressive current records}
Guidelines for spectators:
• Look but please do not touch.
• Walk slowly and look around for models.
• It is best to let a model crash. Please do not try to catch or grab a model.
• When you see someone launching a model, give them some room. Some folks are trying to set U.S. or even World Records here today.
If a collision between you and a flying model is unavoidable, please stand still and let it hit you. You will not be hurt, and you’ll have a terrific story to tell about the time you survived a plane crash. Let the model come to rest on the ground and the owner pick it up.
Press Release: Ron Williams Building & Flying Indoor Model Airplanes

The Cooper Hewitt Design Museum of the Smithsonian Institution has added my book, Building & Flying Indoor Model Airplanes to their shop online and at the museum. It was selected for the book’s illustrations and design. It will be interesting to see what influence it has on what people know about indoor with a new wider audience. When it was first published it sold out quickly but the publisher, Simon & Schuster, did not follow up. It was so popular in one bookstore that a copy was chained to the cash register to save the shelved copies from wear and tear. Indoor flying enjoyed a surge in the years following and a second edition was published by Peregrine Smith. This latest edition is a facsimile of the earlier editions and more information about it can be seen at <www.indoormodelairplanes.com>. The book is also available from the National Free Flight Society (NFFS) and Sam’s models in England.
~Ron Williams

View more by category: Uncategorized (292). .
